
Apple just released a new iPhone software update and you’re eager to try all of the new features it includes. You go to update your iPhone to the latest version of iOS and BAM! Your iPhone won’t update. No matter how many times you try, error messages keep popping up or the process simply stalls, and it’s getting infuriating. In this article, I’m going to show you how to fix an iPhone that won’t update.
My iPhone Won’t Update: Back to Basics
This may seem obvious, but oftentimes rebooting your iPhone can fix update issues. To do this, hold down your iPhone’s power button until the “Slide to Power Off” slider appears. If your iPhone doesn’t have a Home button, simultaneously press and hold the side button and either volume button.
Swipe the red and white power icon from left to right to turn off your iPhone. Wait 30–60 seconds to let your iPhone completely shut down. Then, press and hold the power button or side button until the Apple logo appears on the screen. Your iPhone will turn on again shortly after.

Make Sure Your iPhone Has An Internet Connection
Your iPhone needs an internet connection to download new iOS updates. Some updates, because they are so large, require a Wi-Fi connection. We recommend using Wi-Fi instead of cellular data when downloading updates, as it’s faster and won’t eat into your data plan.
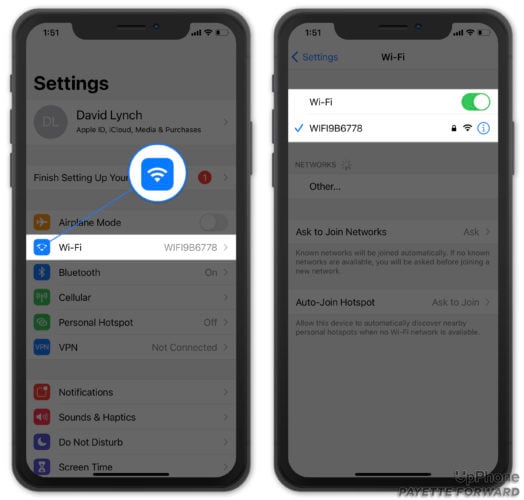
Open Settings and tap Wi-Fi. Make sure the switch next to Wi-Fi is on, and that a checkmark appears next to the name of your Wi-Fi network. Check out our other article if your iPhone is experiencing Wi-Fi issues.
Make Sure You Have Enough Free Space
Next, check if your iPhone has enough room to store the update. iOS updates generally require 750–800 megabytes of free space before they can be installed. (There are 1000 megabytes in 1 gigabyte, so that’s not a lot of space.)
To check how much space is available, do the following:
- Open Settings.
- Tap General.
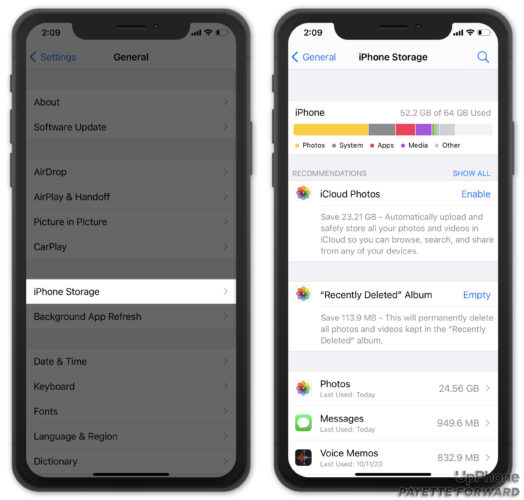
- Scroll down and tap iPhone Storage.
- At the top of the screen, you’ll see how much storage is available on your iPhone. If you have more than 1 GB (gigabyte) available, then you have enough storage space to update your iPhone.
While in Settings -> General -> iPhone Storage, check to see if the update has already downloaded. Occasionally, an issue with the downloaded iOS update file will prevent you from installing it on your iPhone.
Scroll down the list of apps below the Storage Recommendations and look for an iOS update. If you see the update file, tap on it, then tap Delete Update.
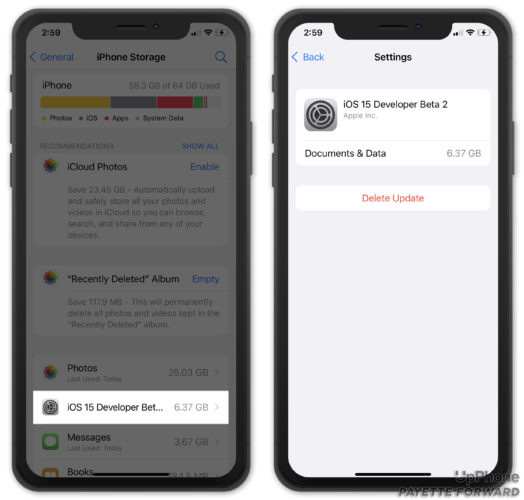
Now that the iOS update is deleted, go to Settings -> General -> Software Update to download the update again.
If iTunes Doesn’t Work, Try The Settings App (and Vice-Versa)
There are two ways to update an iOS device: using your computer (iTunes or Finder) or within the Settings app. If you find you’re getting errors when using iTunes or Finder to update your iPhone, give the Settings app a shot. If the Settings app doesn’t work, try using your computer. I’ll show you how to do both. I highly recommend backing up your iPhone to iTunes, Finder, or iCloud before starting the update process.
Updating Your iPhone In iTunes

- Open iTunes on your computer and plug in your iPhone using your Lightning cable (the cable you use to charge your iPhone).
- Click the iPhone button at the top of the iTunes window.
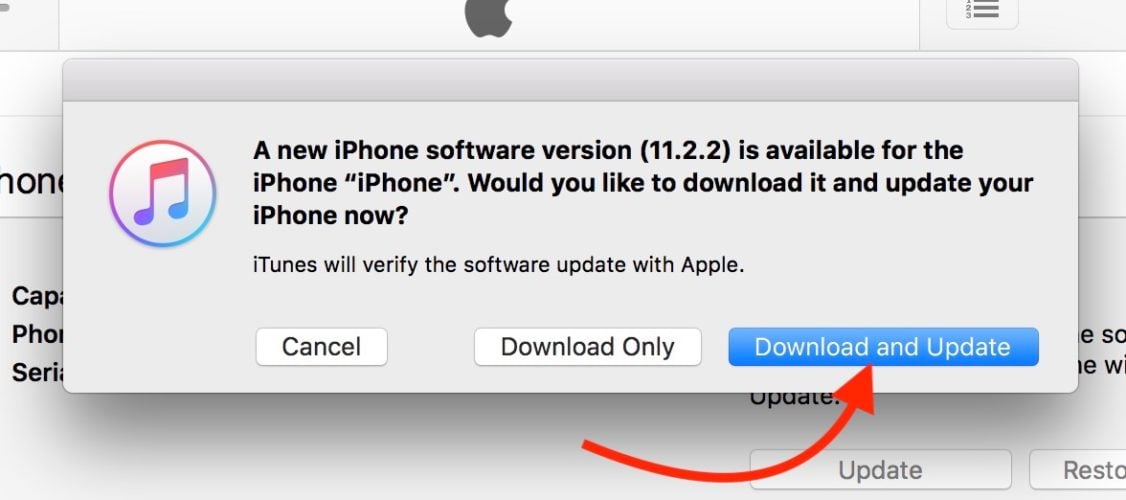
- Click the Update button on the right-hand side of the screen.
- Confirm that you want to update your iPhone by tapping Download and Update.
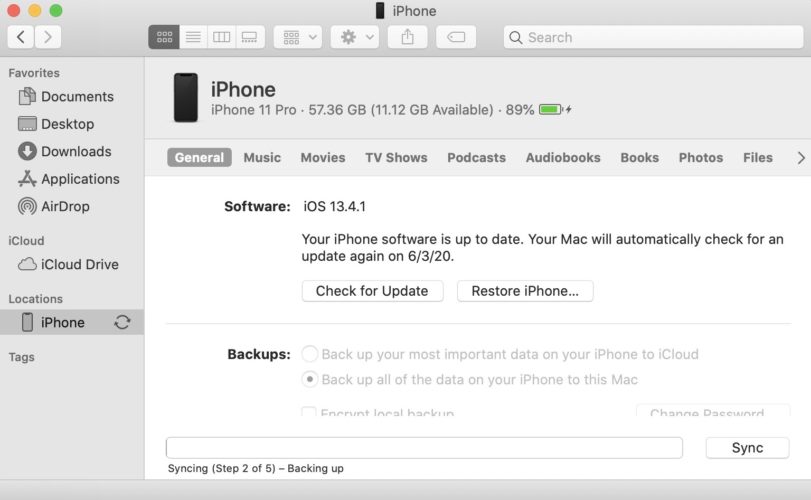
Updating Your iPhone In Finder
If your Mac is running macOS Catalina 10.15 or newer, you’ll use Finder instead of iTunes when updating your iPhone.
- Connect your iPhone to your Mac using a Lightning cable.
- Open Finder.
- Click on your iPhone under Locations.
- Click Check for Update.
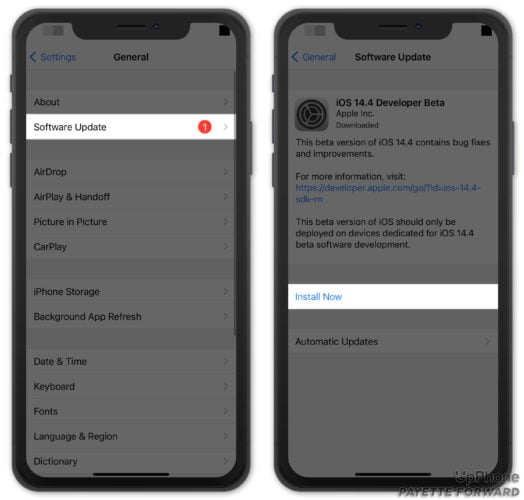
Updating Your iPhone In Settings
- Open Settings.
- Tap General.
- Tap Software Update.
- Plug in your iPhone and tap the Download and Install button.
Is Your iPhone Compatible With The New Update?
Almost every year, a few older iPhones lose their compatibility with new iOS updates. It’s possible your iPhone won’t update because it’s not compatible with the new update. Check out Apple’s website to see the full list of iPhones that can download and install the latest iOS update.
Are Apple Servers Overloaded?
When Apple releases a new iOS update, millions of people are connecting their iPhones to Apple servers to download and install it. With all those people connecting simultaneously, Apple’s server may struggle to keep up, which could be the reason why your iPhone won’t update.
We saw this problem when iOS 13 was released. Thousands of people had a hard time installing the update and asked us for help!
So, if you’re trying to perform a major update on your iPhone, keep in mind that lots of other people are too, so sometimes you just have to be a little patient! Visit Apple’s website to see if their servers are working properly.
My iPhone Still Won’t Update!
If your iPhone still won’t update, it’s time to restore your iPhone in iTunes. Make sure your phone is backed up before restoring, because you’ll be erasing all content and settings from your iPhone.
Restoring Your iPhone In iTunes
- Open iTunes on your computer and plug in your iPhone using a Lightning cable.
- Click the iPhone button at the top of the iTunes window.
- Click the Restore button on the righthand side of the window.
- Confirm you want to restore your device in the pop-up window. iTunes will download the latest version of iOS, erase everything from your iPhone, and install an updated version of iOS.
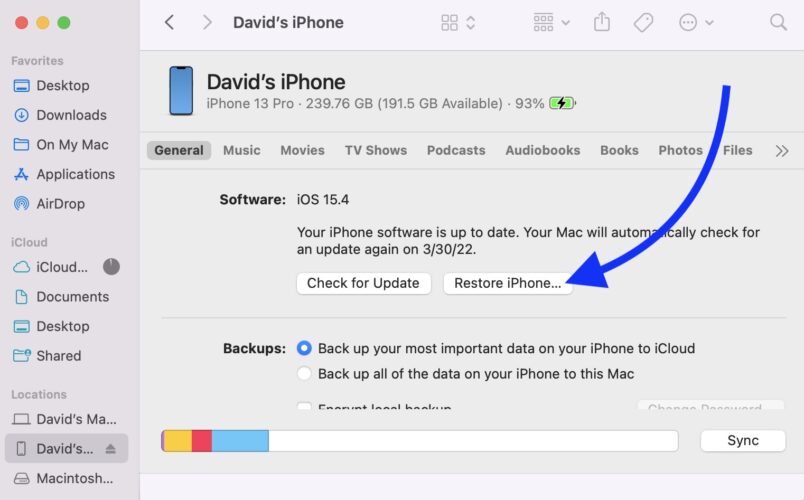
Restoring Your iPhone In Finder
- Open Finder on your computer and plug in your iPhone using a Lightning cable.
- Click on your iPhone under Locations on the left-hand side of the screen.
- Click Restore iPhone.
- Confirm you want to restore your iPhone in the pop-up window.
- Finder will download the latest version of iOS, erase everything on your iPhone, and install the new version of iOS.
Help! A Restore Didn’t Work!
If you’re still seeing errors in iTunes, follow our tutorial on how to DFU restore your iPhone. This is different from a traditional restore because it wipes all software and hardware settings from your phone. It’s often seen as the final step in fixing software on a stuck iPhone. If the DFU restore doesn’t work, there’s probably a hardware problem with your iPhone.
Your iPhone: Updated
And there you have it: your iPhone is finally updating again! I hope this article helped you out. Let us know which solutions worked for you in the comments section below.