Photo-happy iPhone users (like me!) know that you can wind up with a ton of pics on your iPhone. If you want to be able to view those fabulous photos on your computer and have a secure local backup, you need to know how to transfer pictures from an iPhone to the computer.
Thankfully, it’s easy to move pics from one place to the other. This handy guide will walk you through the options for transferring pictures from an iPhone to the computer, whether you have a Mac, a PC, or want to use iCloud.
How To Transfer Pictures From iPhone To PC
To move pictures from your iPhone to a Windows computer, you’ll need a chord with a USB plug on one end and an iPhone charging plug on the other (also known as a lightning to USB chord).
Plug your iPhone into the computer with the cable. Your iPhone may ask you if it’s okay to trust this computer. Tap on Trust if this comes up. You may also have to unlock your iPhone. Enter your passcode or swipe to open your iPhone.

I personally use iCloud to transfer pictures from my iPhone to my computer (we’ll talk about that in a minute). So when I tried to transfer my iPhone photos to my PC, I ran into a problem: Some off-brand chords won’t let you transfer photos. When you attempt this, make sure you’re using an Apple lightning to USB chord. I’ve learned my lesson!
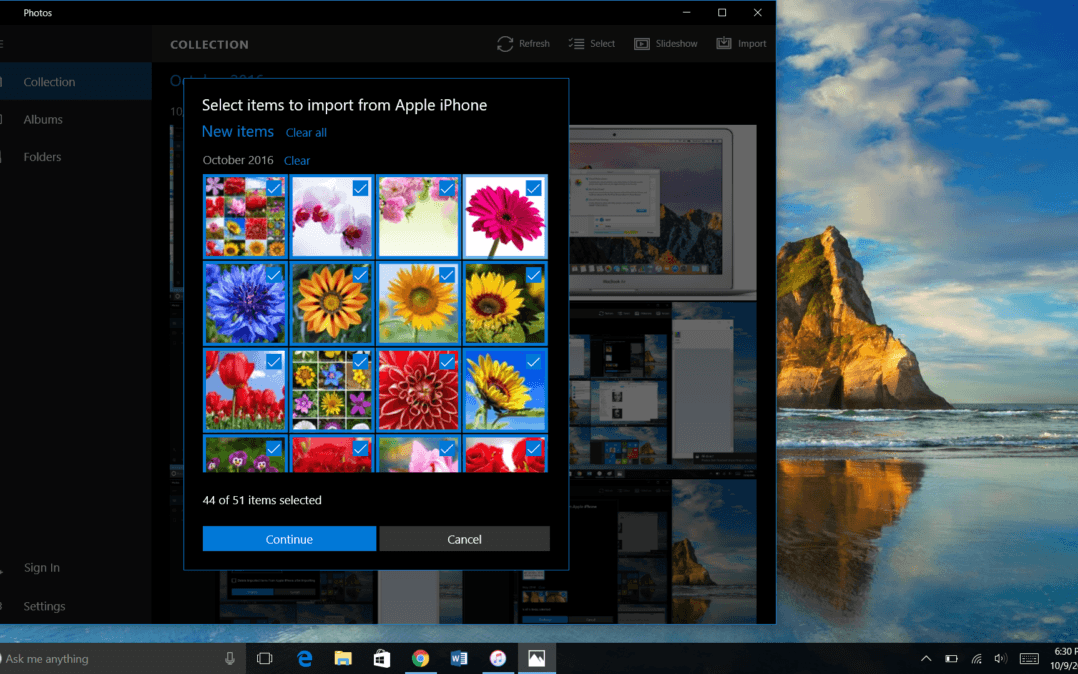
Once you have your iPhone plugged into the computer, open the Photos app. You can find this in the Start menu. Just scroll through the programs until you get to “P” and then click on Photos. You can also go to your Windows search field and type in “photos” to find it.

Congratulations! You’ve transferred pictures from your iPhone to a computer. When the transfer is complete, you can access those iPhone photos on your computer any time, even if the device isn’t connected to the computer.
How To Transfer Pictures From iPhone To Mac
To transfer pictures from your iPhone to a Mac computer, you’ll use the same lightning to USB chord. Plug one end of the cable into your computer and the other end into your iPhone.
You may also see the same prompts, asking you to trust this computer. Make sure your iPhone is powered on and unlocked.
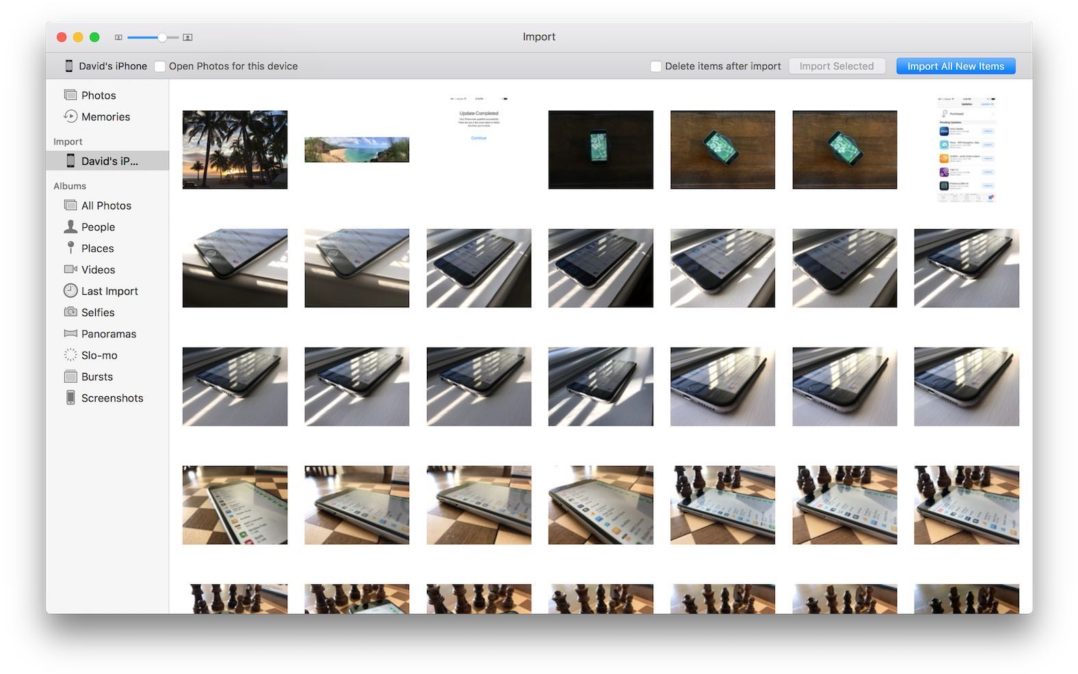
Once your iPhone is plugged into your Mac, the computer should automatically open the Photos app. If it doesn’t, you can open it yourself. Open a new Finder window, click Applications on the left, and double-click to open Photos.
In the open Photos app, select your iPhone under the Import tab in the left-hand sidebar. This page will show you all of the available media on your connected iPhone. You can also get here by selecting your iPhone in the sidebar.
From here you can choose to import all new photos or select the photos you want to transfer from your iPhone to your computer, then click Import Selected. You will be prompted to decide if you want to delete the photos you just transferred to the computer off of your iPhone.
Now your iPhone photos are safely stored on your Mac! You can look through them any time, even if your computer isn’t connected to your iPhone.
How To Transfer iPhone Pictures From iPhone Using iCloud
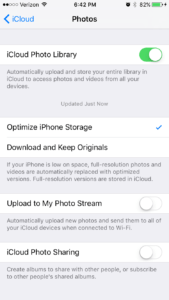
If you don’t want to manually transfer pictures from your iPhone to a computer, iCloud is so handy. It can automatically send new photos to both iCloud and your computer. You just have to set it up, and then sit back and let iCloud do its thing. This is my personal favorite way to transfer pictures from my iPhone to a computer.

Next, you’ll need to set up iCloud on your computer. For a Windows computer, you’ll download iCloud for Windows. iCloud is already built in to Macs. To set up iCloud on your Mac, click the Apple icon, choose System Preferences, and click on iCloud. Follow the prompts to set up the service, and make sure Photos is selected when you choose which items to sync to iCloud. Select Options next to the word Photos, and make sure iCloud Photo Library is selected.
Once iCloud is set up on your computer, any photo that is saved to iCloud from your iPhone will automatically go to the iCloud set up on your computer. It’s that easy!
Now You Know How to Transfer Pictures from iPhone to Computer!
Whether you’re a die-hard iCloud fan like me, or you prefer the personal touch of transferring iPhone pictures to the computer with a cable, now you’re ready to go! Have you ever transferred pictures from your iPhone to a computer? Did you like it better than using iCloud? Tell us about it in the comments. We’d love to hear from you!


You use a cord to transfer data. A chord is a group of (typically three or more) notes sounded together, as a basis of harmony.
How do you transfer iPhone photos to a Windows 7 computer? There’s no photo app that I could find.