You want to have more control over what your kids do when they’re borrowing your iPhone, but you’re not sure how. Fortunately, you can use Guided Access on an iPhone to stay locked into a single app. In this article, I’ll explain what iPhone Guided Access is, how to set it up, and how you can use it as a parental control!
This is part two of our series about iPhone parental controls, so if you haven’t already, be sure to check out part one of my Parental Controls on iPhone series.
What Is iPhone Guided Access?
iPhone Guided Access is an Accessibility setting that helps keep apps from closing on an iPhone and allows you to set time limits on iPhones.
How To Keep Apps From Closing Using Guided Access
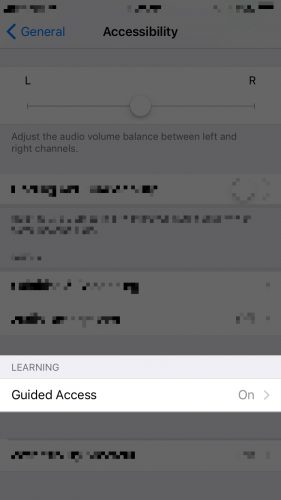
Finding the Guided Access menu in the Settings app requires a little digging. You find it by going to Settings > General > Accessibility > Guided Access. It’s the last item in the menu screen of Accessibility, so be sure to scroll all the way down. Turning on Guided Access is how you will keep apps from closing.
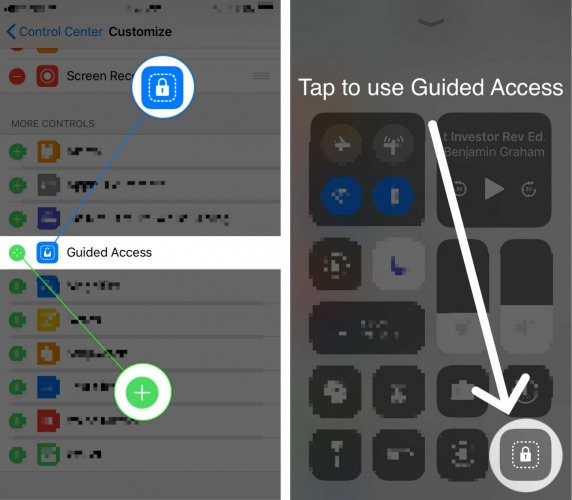
If your iPhone is running iOS 11, which was released in Fall 2017, you can add Guided Access to Control Center to access it more quickly.
How To Add Guided Access To Control Center On An iPhone
- Begin by opening the Settings app on your iPhone.
- Tap Control Center.
- Tap Customize Controls to get to the Customize menu.
- Scroll down and tap the small green plus next to Guided Access to add it to Control Center.
Set Up Parental Controls On Your iPhone With Guided Access
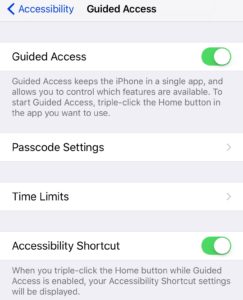
- Toggle on Guided Access. (Make sure the switch is green.)
- Set up a passcode by going to Passcode Settings > Set Guided Access Passcode.
- Set a passcode for Guided Access (if your kids know your iPhone passcode, make it different!).
- Choose whether you want to enable touch ID or not.
- Select a Time Limit. This can be an alarm or a spoken warning, notifying you when the time is coming to an end.
- Turn on Accessibility Shortcut. This will allow you to change any settings or restrictions at any time.
Deactivate Screen Options In Any App
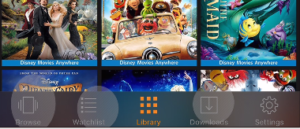
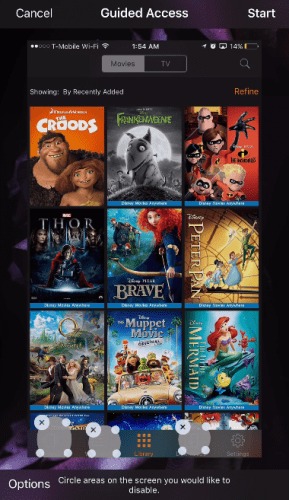
First, you will see the choices to Circle areas on the screen you would like to disable. Draw a small circle over the options you want to prevent your kids from using.
In my Amazon app, I circle the options for Browse, Watchlist, and Downloads. I have Library and Settings still available to select. I left Library open so that my kids can go to the movies I have already purchased and downloaded to the device.
Other Parental Controls With iPhone Guided Access
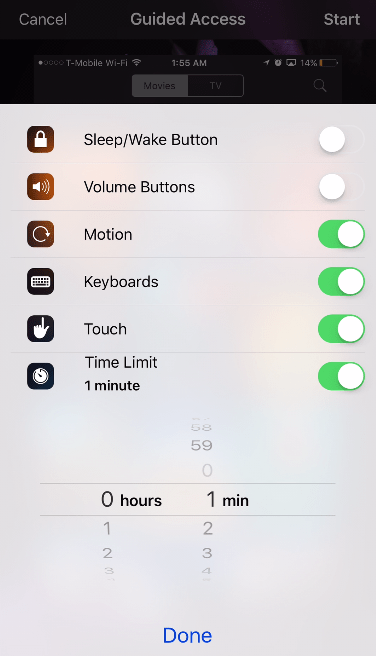
Tap Options in the bottom left-hand corner of the iPhone Guided Access menu. You will then be able to select all of the following parental controls:
- Toggle off the Sleep/Wake Button, and your kids won’t be able to accidentally press the lock button, which would close the screen and stop the movie.
- Toggle off the Volume Buttons, and your children won’t be able to change the volume of the show, movie, or game they are playing. Keep those eardrums healthy!
- Toggle off Motion, and the screen won’t turn or respond to the gyro sensor in the iPhone. So don’t turn this off for motion-controlled games!
- Toggle off Keyboards, and this will turn off the ability to use and access the keyboard when in the app.
- Toggle off Touch so the touch screen won’t respond at all when Guided Access is activated. Only the Home button will respond to touch, so you’ll know that your kids are only viewing the movie or playing the game YOU want them to.
To start Guided Access, tap Start.
Limit The Time Your Kids Can Watch Movies Or Play Games On An iPhone, iPad, Or iPod
Triple-click the home button to bring up the iPhone Guided Access menu. Tap Options in the bottom left of the screen.
You can now set a time limit for how long you want your kids to watch a movie or play a game on your iPhone. This feature works great if you want to put the kids to bed when a movie is on, or if you want to limit the amount of time they can play their favorite game.
After setting all the options and disabling any portions of the screen, tap Start to activate Guided Access. If you’ve changed your mind about using the feature, hit Cancel instead.
Leaving Guided Access, Mommy Needs Her iPhone Back!
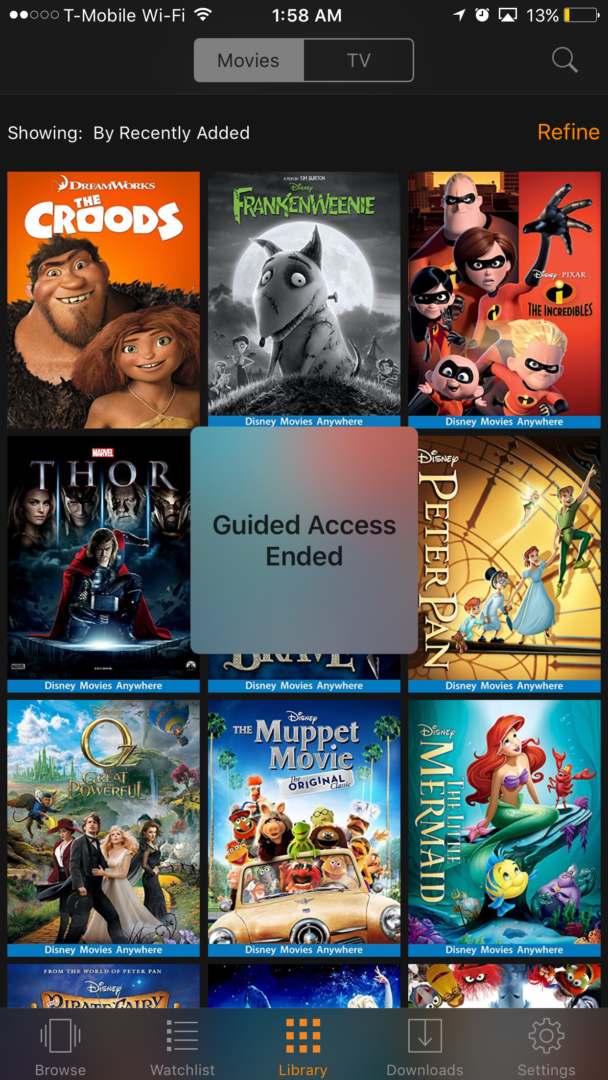
After your tiny human has watched his or her favorite movie and fallen asleep, you’ll want to disable Guided Access. To turn off Guided Access triple click the Home button, and it will bring up the option to enter the Passcode or use Touch ID to end Guided Access and allow you to use your iPhone normally.
Guided Access Ended
Now you have learned how to activate, use, and leave iPhone Guided Access. If you’ve also read my article on how to use Restrictions as a parental control, you have now learned how to control, monitor, and limit your kids’ usage on the iPhone, iPad, and iPod. Don’t forget to share this article with all the parents you know on social media!
Thanks for reading,
Heather Jordan

[…] There are a lot of iPhone parental controls built into Screen Time. However, you can do even more using Guided Access too! Check out our other article to learn everything you need to know about iPhone Guided Access. […]